Step-by-step guide on how to protect your privacy on social media
Learn how to protect yourself online with this guide

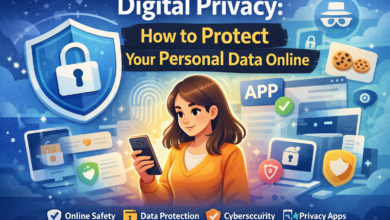
In today’s hyper-connected world, social media is the digital town square. We use it to stay in touch with family, network for jobs, and share our most cherished memories. However, this convenience comes with a steep price: our personal privacy. Every “like,” “share,” and “check-in” contributes to a massive data profile that can be used by advertisers, data brokers, and—more dangerously—cybercriminals.
Taking control of your privacy is no longer optional; it is a fundamental part of digital hygiene. This comprehensive guide will walk you through a professional, step-by-step process to lock down your accounts, scrub your digital footprint, and ensure that your private life remains exactly that: private.
Why Social Media Privacy is More Than Just a Setting
Many users believe that clicking a “Private Account” button is enough to stay safe. In reality, privacy is a multi-layered ecosystem. It involves technical settings, behavioral habits, and an understanding of how data flows across the internet.
When your privacy is compromised, the risks range from targeted identity theft and “doxing” to more subtle harms, such as your data being used to influence your insurance premiums or credit scores. Protecting yourself in 2026 requires a proactive rather than reactive approach.
Step 1: Audit Your Current Digital Footprint
Before you can secure your future, you must understand your past. Most of us have “zombie” accounts—old profiles on platforms we no longer use but that still contain sensitive personal data.
Perform a “Self-Google” Search
Open an incognito or private window and search for your name in quotes (e.g., “John Doe”). Look beyond the first page. Check Google Images and video results. You might find old MySpace photos, forgotten blog posts, or tagged images on public accounts that you didn’t know existed.
Catalog Your Active and Inactive Accounts
Make a list of every social platform you have ever joined. For the accounts you no longer use, the best privacy move is to delete them entirely. If you want to keep the data, download an archive of your information from the platform’s settings before hitting the delete button.
Step 2: Mastering Platform-Specific Privacy Settings for 2026
Every platform has its own labyrinth of menus. While they change frequently, the core principles of “locking down” an account remain consistent across Facebook, Instagram, X (formerly Twitter), and TikTok.
The Privacy Baseline Table
Use this table as a checklist when reviewing your settings on any major platform:
| Feature to Disable | Why It Matters | Recommended Setting |
| Search Engine Indexing | Prevents your profile from appearing in Google searches. | OFF / Disabled |
| Friend List Visibility | Prevents strangers from seeing who you are connected to. | “Only Me” or “Friends” |
| Tagging Approval | Stops others from posting photos to your timeline without consent. | ON (Manual Review) |
| Data Personalization | Limits how much data the platform sells to advertisers. | Minimal / Essential Only |
| Read Receipts | Prevents others from knowing exactly when you are online. | OFF |
Facebook and Instagram “Privacy Checkups”
Both Meta-owned platforms now offer a “Privacy Checkup” tool. While helpful, these tools often ignore deeper data-sharing settings. Go into Settings > Meta Accounts Center to manage your activity across both platforms simultaneously. Ensure that “Off-Facebook Activity” is cleared and turned off to stop the platform from tracking your browsing habits on other websites.
Step 3: Strengthening Login Security with Advanced Authentication
Privacy and security are two sides of the same coin. If someone gains access to your account, your privacy settings become irrelevant.
Moving Beyond SMS-Based Two-Factor Authentication (2FA)
While any 2FA is better than none, SMS (text message) codes are vulnerable to SIM-swapping attacks.
-
Use Authenticator Apps: Apps like Google Authenticator, Authy, or Microsoft Authenticator generate codes locally on your device, making them much harder to intercept.
-
Hardware Security Keys: For high-profile accounts, consider a physical YubiKey. This requires you to physically touch a USB or NFC device to log in, providing the highest level of protection available today.
The Role of Password Managers
Never reuse passwords. If your LinkedIn password is the same as your Instagram password, a breach at one company compromises both. Use a dedicated password manager to generate and store 100-character, randomized strings for every site.
Step 4: How to Revoke Third-Party App Permissions and API Access

Over the years, you have likely clicked “Sign in with Facebook” or “Sign in with Google” for dozens of apps, quizzes, and websites. Many of these apps retain “read” access to your profile long after you stop using them.
Cleaning Out the “API Junk”
Go to the “Security” or “Apps and Websites” section of your social media settings. You will likely see a list of apps you don’t recognize.
-
Revoke Access: Delete every app you haven’t used in the last 90 days.
-
Check Permissions: For the apps you keep, ensure they don’t have access to your “Friends List” or “Private Messages.”
-
Use “Sign in with Apple” (if applicable): This feature allows you to hide your real email address from third-party developers, creating a unique “relay” email instead.
Step 5: Preventing Geotagging and Metadata Leaks in Photos
Every photo you take with a smartphone contains EXIF data. This hidden metadata includes the exact GPS coordinates, the time of day, and the device used.
The Danger of the “Home” Geotag
If you post a photo of your pet or a meal while at home, a savvy user can download that image and extract your home address.
-
iOS/Android Settings: Go to your phone’s Privacy/Location settings and disable “Location Access” for the Camera app.
-
Platform Stripping: Most major platforms like Facebook and Instagram strip EXIF data automatically, but smaller forums or direct messaging apps (like WhatsApp) may not. Always assume the metadata is there unless you have manually removed it using a “Metadata Scrubber” app.
Step 6: Defensive Posting and Filtering Your Audience
The most effective privacy tool is your “Post” button. You must become your own editor.
Segregating Your Audience
Don’t share everything with everyone. Use features like:
-
Instagram’s “Close Friends” list.
-
Facebook’s “Custom Lists” (to hide posts from coworkers or distant acquaintances).
-
X’s “Circles.”
Avoiding “Sensitive” Backgrounds
Before posting a selfie, look at what is behind you.
-
Is there a piece of mail on the counter with your address?
-
Is there a school logo on a child’s backpack?
-
Are your keys visible on the table? (High-res photos can be used to 3D-print key duplicates).
Step 7: Identifying Social Engineering and “Privacy Quizzes”
Social engineering is the art of manipulating people into giving up confidential information. On social media, this often takes the form of fun engagement posts.
The Red Flags of Data Harvesting:
“What was the make of your first car? Your ‘Spy Name’ is the color of your shirt + that car!”
“Post a picture of your high school graduation year!”
“Which Disney character are you? Click here to find out!”
These are not harmless games. They are designed to collect the answers to your security recovery questions. If you have ever answered one of these, change your security questions on your bank and email accounts immediately.
Step 8: Dealing with Tagging and Public Mentions from Others
You can be the most private person in the world, but your friends can still compromise you. If a friend tags you in a photo at a bar while you are supposed to be on medical leave, your privacy is gone.
Enable Timeline Review
Ensure that no post you are tagged in appears on your profile without your explicit approval. This gives you the chance to “untag” yourself or ask the friend to remove the photo before it becomes part of your public record.
The “Right to be Forgotten”
If a friend or family member posts something about you that you find invasive, speak up. Most platforms also have tools to report “Privacy Violations” if someone posts your personal information (doxing) without your consent.
Step 9: Using Privacy-Focused Tools to Access Social Media

How you access the internet is just as important as what you do on it.
-
Use a VPN (Virtual Private Network): A VPN masks your IP address, making it harder for platforms to track your physical location and service provider.
-
Privacy Browsers: Use browsers like Brave or Firefox with strict tracking protection. These browsers block the “trackers” that follow you from social media sites to other stores and news sites.
-
Container Tabs: Firefox offers a “Multi-Account Containers” extension that allows you to isolate your Facebook activity into a single tab, preventing it from seeing what you are doing in other tabs.
Step 10: How to Safely Deactivate or Delete Accounts
If you decide that the privacy cost of a platform is too high, you have two options: Deactivation or Deletion.
-
Deactivation: This is temporary. Your profile is hidden, but the platform keeps all your data in case you want to return.
-
Deletion: This is permanent. The platform is legally required (in many jurisdictions) to wipe your data from their servers within a certain timeframe (usually 30 to 90 days).
Warning: Before deleting, always go to the “Download Your Data” section to keep a copy of your photos and contacts. Once the account is gone, it is gone forever.
Privacy is a Continuous Practice
Securing your privacy on social media is not a “set it and forget it” task. As platforms update their terms of service and hackers develop new techniques, you must remain vigilant. By following this step-by-step guide, you have moved from being a passive product of the data economy to an empowered user in control of your digital identity.
Remember, the internet never forgets, but it can be managed. Stay curious, stay skeptical, and always think before you link.